Adding sales badges on the WooCommerce products of your online shop can be an effective way to promote them and improve its sales. These badges can quickly grab the attention of your customers and let them distinguish the latest product of your store, the best sellers, trending items, and so on. This will make your eCommerce product list more informative, attractive, and well organized. Moreover, you can also highlight different seasonal offers, discounts, % off on the products you want to sell the most and enhance its conversions.
 How to Add a Sales Badge on Your eCommerce Store to Boost Conversions?
If you have installed WooCommerce on your online shop then, you might be familiar with the “SALE!” badge and “Featured” list that comes inbuilt on the plugin. These settings will allow you to indicate the “on Sale” products and the “featured” products on your online store.
However, if you want to display your product badges attractively on different positions then, the default options provided by WooCommerce plugin might not be enough for you. Also, the plugin won’t let you customize the label or add the exact percentage of your offers. So, to add the awesome promotional badges on the position of your preference, you might consider using a WooCommerce sales badge manager plugin available on the internet. These plugins come with different badge layouts/templates and tons of customization and configuration options to embed stunning sales badges on your WooCommerce shop.
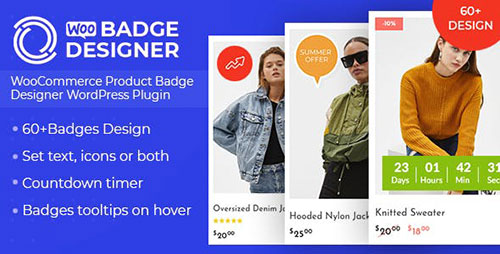
Here, in this article, we will be using one of the most feature-rich WooCommerce badge manager plugins – Woo Badge Designer. It is a premium WordPress plugin, packed with responsive badge designs and limitless customization options to insert eye-catchy sales badges on your eCommerce products.
Some of the Best Features Available on Woo Badge Designer:
- Create Unlimited Number of Promotional Badges
- 30+ Text Background Badge Templates
- 30+ Image Background Badge Templates
- 6 Different Positions to Display Badges
- Add Countdown Timer on Along with Badges
- 10 Ready to Use Timer Templates
- Display Countdown Timer on 5 Different Positions
- Badges Customizability
- Add Multiple Badge to Each product
Adding WooCommerce Sales Badges on the Product of your Online Store Using Woo Badge Designer:
Now let’s begin this step by step tutorial and add some beautiful sales badge for your WooCommerce products:
Step 1:
More Info / Download View Demo
Purchase Woo Badge Designer plugin from the CodeCanyon marketplace at a reasonable price of $24 and install and activate them on your WooCommerce WordPress website.
Step 2:
Upon completing the activation of the plugin, you will see “Woo Badge Designer” on the left menu of your admin dashboard. Click on it to continue.
You will land to the “All Badge” page where all the badges that you have created with this plugin will be stored.
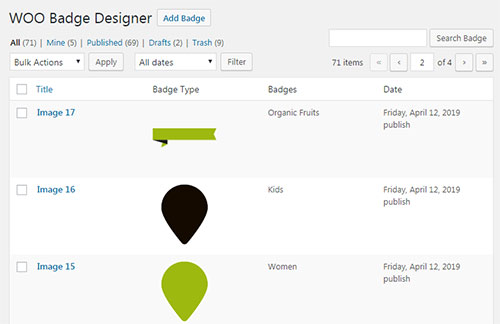 To add a new sales badge for your eCommerce products, click on the “Add Badge” button available on the top of the page.
Step 3:
You will be directed to the “Add New Badge” page of the plugin. It contains different settings tab to create, configure, and customize your promotional badge. Before going to the settings, give the title to your new badge.
Note: The plugin is entirely customizer based and allows you to fetch the live preview of all the changes you have made.
The settings tab include the following:
Badge Layouts:
This settings tab allows you to configure the appearance of your promotional badges. You can select the most suitable positions of the badge on your product from 6 inbuilt positions available. Besides, you can any of the 2 background type i.e., image background and text background and most suitable background template for your WooCommerce badge to match the design of your online store.
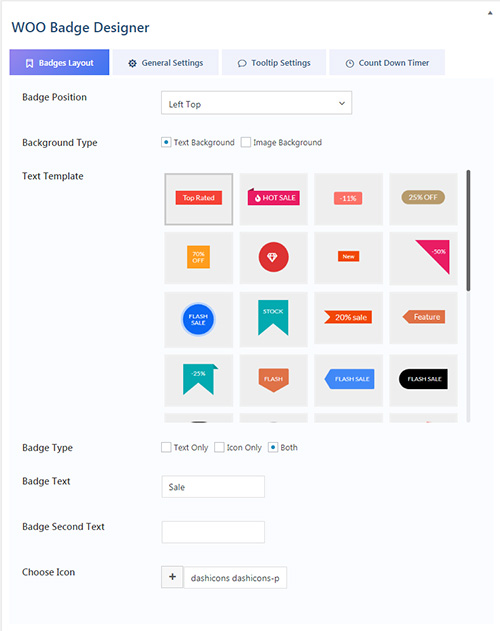 Additionally, you can either display the text only, icon only or both on the badge with custom text and icons.
General Settings:
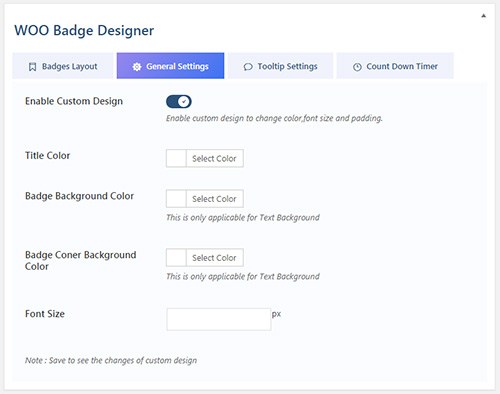
This tab allows you to customize the designs of your badges by choosing the best title color, background color, corner background color, and font size.
 Tooltip Settings:
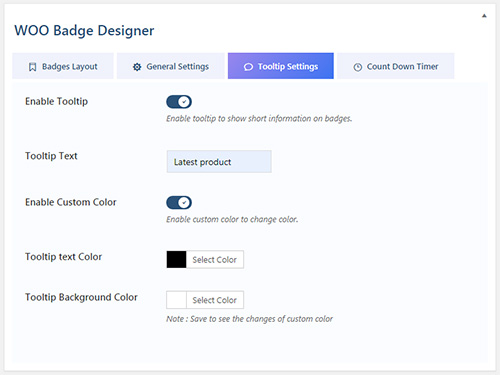 From here, you can enable the tooltip of the badges to display a short message of the product upon hovering. You can make it attractive by setting the unique tooltip text and background color.
Countdown Timer:
This settings tab will allow you to insert countdown timer on eCommerce products to signify the end time for the sales, offers, and discounts.
You can set the expiry date and time with the help of the inbuilt calendar and select any of the 10 pre-designed timer templates available.
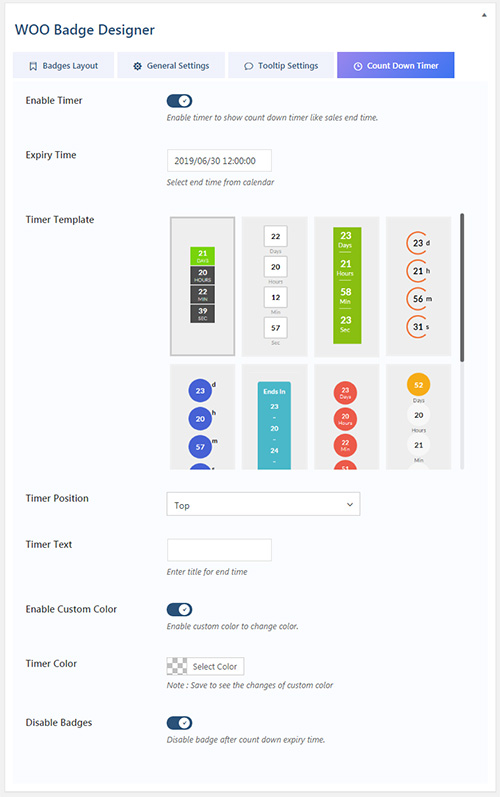 Then, set your countdown timer on any of the 6 available positions provided by the plugin.
Step 4:
After you have configured and customized all the options available on the plugin, click on the Save button to save your newly designed promotional badge.
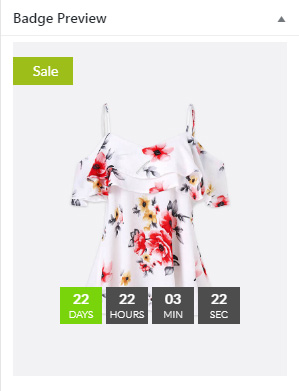
Then, you will be able to add the badge like the one below in the pic on your WooCommerce products.
 Conclusion:
In this way, you can add WooCommerce promotional badges using the badge manager plugin to help you increase the sale of your products. A sales badge allows you to display various offerings to the products that you want to sell the most for attracting more customers, getting more click through and boost its conversions.
Grab Woo Badge Designer Plugin Now


Hi Himanshu,
It was great to write for Frip.in! Thank you for featuring my article here.
Regards,
Prithu
WPHowToPress.com